Alexandra Waller
Is Corn Gluten-Free?

If you need to maintain a gluten-free diet, you may want to stay away from corn. Is corn gluten-free? Yes, corn is gluten free when it is consumed in its natural form. However, you need to be aware that there are other forms of food that are corn-based but are not necessarily gluten-free. Sauces and foods that contain several other ingredients, which is why you should check the label or list of ingredients in order to be sure the food you are consuming is gluten-free. Listed below are tips and information about corn in order to help you learn when corn is gluten-free and when it is not.
You should be aware that gluten-free does not necessarily mean that the product is healthy. The gluten-freeoption is meant to help those who have gluten intolerance. Corn can be on the list of food that is gluten-free, but there are still possibilities that it contains gluten when there are added ingredients.
Other Forms of Corn
Corn in its original form is gluten-free, but there are other forms of corn that are gluten-free as well. Listed below are a few variations of corn that can be eaten if you have gluten intolerance or celiac disease.
Cornstarch
In its natural form, cornstarch is gluten-free. Cornstarch is usually found in foods like soup, sauces, and stews to thicken the product. By grinding the starchy or carbohydrate portion of corn into a powder, cornstarch is made. Although cornstarch is on the list as being gluten-free, be aware that not all foods containing cornstarch are necessarily gluten-free as well.
Cornmeal
As another gluten-free option, cornmeal does not contain gluten in its natural form. Cornmeal is a kind of flour made from corn and is therefore gluten-free. However, make sure to look at the labeled gluten-free cornmeal in order to be sure your product is completely gluten-free and there was no cross-contact during the manufacturing process.
Corn Flour
Also gluten-free in its natural form, corn flour can be compared to cornmeal. Corn flour has a light texture, which is why it is great to use while baking. Again, it is highly important that you look at the label for gluten-free in order to be certain that the corn flour you are purchasing is free of gluten.
Hominy
Made from dried corn, hominy is another great gluten-free option. After the corn kernels are dried, they are soaked in a lime or lye bath. Hominy is found in several products, such as tortillas.
Popcorn
If you prepare your own popcorn, it is generally gluten-free. Preparing and popping corn from its natural form is safe and tastes great. However, if you purchase ready made popcorn, there is a higher risk that it contains gluten due to cross-contact during the manufacturing.
When is corn gluten-free and when is it not?
Below includes more information about corn and how to decide when it is gluten-free and when it is not.
Corn
Plain, regular corn in its natural form is usually gluten-free. Simply eating corn on the cob should not have any risk of containing gluten as long as there was not cross-contact during the manufacturing process. In order to avoid corn that has gluten, make sure to check the labels on canned or frozen corn. As long as you are preparing the corn yourself, you do not need to worry, but when you are purchasing products from the store be more aware of the ingredients.
Cream Corn
When you purchase cream corn, look closely at the can. Because cream corn comes in a can it does not necessarily mean that it is gluten-free. The canned good contains cream that is made up of food starch, which has other ingredients. However, you are making the cream corn at home, you do not need to be as aware because you are deciding what ingredients to use.
Processed Corn
Although the various forms of corn mentioned earlier above are all gluten-free, not all companies maintain a gluten-free environment so there may be a higher chance for cross-reactivity or cross-contact. Companies like Bob’s Red Mill and Arrowhead Mills have gluten-free products that come from a gluten-free facility. If you are unsure about the product, contact the company.
So, is corn gluten-free?
Yes, corn is gluten-free when it is in its natural form. If you want to keep and maintain a gluten-free diet, try practicing home cooked meals to ensure you know the exact ingredients in your food. With that said, be sure to look at the labels of the food you buy from the store because they may contain gluten even if they contain corn because of cross-contact or added ingredients.
The Four Phases of Your Menstrual Cycle

Are you familiar with the four phases of your menstrual cycle? If you would like to learn more about each stage, read through the following article. Each phase of your menstrual cycle has different effects, which is why you may feel moody one day and tired another day. In order to prepare how to work with your cycle, you need educate yourself about the four phases of your menstrual cycle.
The four phases of the menstrual cycle include: menstruation, the follicular phase, ovulation, and the luteal phase. Every woman’s cycles vary, but the average length of the menstrual cycle is about 28 days. Some women have longer menstrual cycles while others have shorter; it solely depends on the individual. You can calculate your menstrual cycle by noting the first day of your period and observing when the next period will start. Below are the four specific phases of the menstrual cycle explained to help you better understand your cycle.
Menstruation
The menstruation phase is also known as the bleeding phase, which usually lasts between three and seven days. During the menstruation phase, your energy begins to decline and you feel tired. However, not every woman feels the same. It is more likely for you to feel less energy during this phase, but it is not guaranteed. The first day of your cycle is when you begin bleeding, and your progesterone level drops.
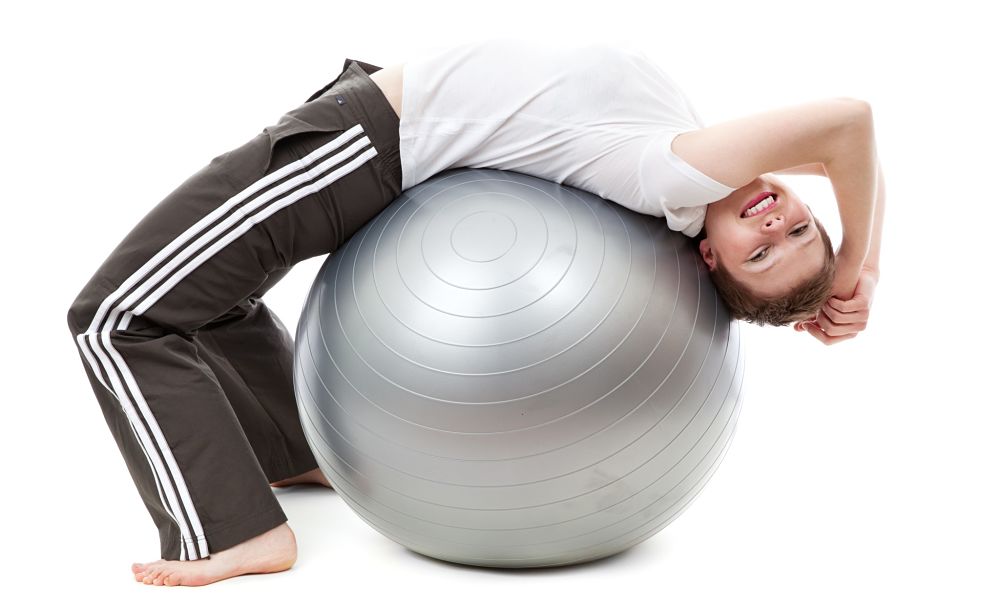
What to Do: Because you have less energy during the menstruation phase, try limiting your exercise time and go for a short walk or do some yoga. Yoga and simple stretches are excellent to relieve pain from cramps or headaches because it loosens up your body and keeps you in a meditative and calm state. Pamper yourself and give yourself some time to just breathe. Have a nice, hot bath and go to bed an hour earlier than you usual would. Make sure to not overexert yourself and leave some time to be alone so you can focus only on yourself.
The Follicular Phase
This phase begins when the menstruation phase ends and usually lasts between seven and ten days. The term “follicular” comes from the hormone FSH, the Follicle Stimulating Hormone. The pituitary gland releases the hormone during this phase in which FSH stimulates the follicles in the ovaries so that they become mature. During the follicular phase you begin to feel lighter and happier because of the low amounts of estrogen and testosterone. However, as time continues and you get closer to your menstruation phase the levels of estrogen and testosterone increase.
What to Do: Be social! Your energy and spirit should feel refueled, which makes it easier to socialize and start new things. Engage in demanding activities and challenge yourself, such as going to a strenuous exercise class. Try experiencing new and unfamiliar things like going to an art class or work on something you have been wanting to finish for some time.
Ovulation
The ovulatory phase usually lasts between two and three days and is the shortest phase of the menstrual cycle. Before ovulation, the pituitary gland releases the hormone called LH (or the Luteinizing Hormone) so that it causes the dominant follicle to open and release the egg into the fallopian tube. Usually, during the ovulatory phase you feel more confident and attractive due to the steadily increased levels of estrogen and testosterone. Sexual feelings also increase during this phase and you may experience heightened senses like smell and taste.
What to Do: Enjoy lots of physical activity and exercise. Your energy levels have reached a high during this phase, so get in lots of exercise. Do some high impact workouts or go running. Join a zumba or workout class and get moving. Make important plans during this phase or schedule public speaking. Also, enjoy flirting during the ovulatory phase.
The Luteal Phase
Lasting between twelve and sixteen days, the luteal phase occurs after the ovulatory phase. The levels of FSH, LH, estrogen, and testosterone all steadily decline while progesterone is produced and gradually increased. Progesterone stimulates the growth of the lining of the uterus and therefore helps in preparing for pregnancy. However, when you are not pregnant, the uterine lining will shed, which leads into the first phase of the menstrual cycle (the menstruation phase).
What to Do: During the week before your period, make sure to really pay attention to yourself. Practice self-care by eating healthy foods and getting what your body needs. Do things that you enjoy doing like reading or practicing yoga.
In Sum…
To sum it all up, there are the four phases of the menstrual cycle, including the menstruation, follicular, ovulatory, and luteal phases. Keep yourself informed so that you can better deal with your menstrual cycle.
What is Yoga Nidra?

If you enjoy practicing yoga, you might also enjoy yoga nidra. Yoga nidra is also considered as “yogic sleep” because it involves maintaining a deep, meditative state. Whether you are practicing yoga nidra in a yoga class or at home, there are several benefits in this style of meditation.
Although yoga nidra is also considered as “yogic sleep,” there is a difference between regular sleep and yoga nidra. When you sleep your conscious mind does not work and instead your subconscious takes control. However, yoga nidra is the opposite and involves the conscious mind working in a deep state of meditation. If this sounds like something you are interested in, listed below are some steps for performing yoga nidra.
Step 1: Lie Down
Begin by lying down with your back on the floor. If you prefer to, place a blanket or bolster under your back with a block under it near the top end towards your head. The blanket or bolster should be placed directly under your back to provide the most support. Place a blanket or a comfortable prop under your head in order to support your head. Feel the support of the props and the ground. Notice the different sounds, smells, and light. Release any tension and relax your entire body. Try not to let any thoughts intrude your mind. Instead, you need to also relax and calm your mind.
Step 2: Connection
Center yourself and connect your mind with your body. Let your heart’s deepest desire come to mind and connect your desire with your body by imagining as if it were true. Your deepest desire should be something that you truly want, such as good health or better well-being. As soon as you have connected with your deepest desire, set an intention. Your intention can be something as simple as going to bed earlier or something more important in your life. With your intention set, make it a resolution. Keep your intention in the back of your mind and allow it to connect with the rest of your body. Make sure to stay loose and calm throughout yoga nidra.
Step 3: Focus on Your Body
As you shift your awareness, make sure to scan and focus on your body. Notice if your mouth or jaw is tense and if it is, try to relax it. Sense the other parts of your body and notice if you are tense anywhere else. Scan your entire body by noticing your nose, eyes, neck, hands, fingers, arms, legs, and feet. Work your way down your body and focus on each part. Your consciousness stays centered on your body while your mind visits each part of your body. Focusing on your body, you are able to relax each part of your body. Become aware of each body part and feel your body relax.
Step 4: Focus on Your Breath
Breathe slowly and deeply as you become aware of your breathing. Focus on your breath by sensing the slow movement of your chest as you inhale and exhale. Feel the air flow through your nose and fill up your lungs as you inhale. And as you slowly exhale, feel everything leave your body, including your breath and worries. Each breath you take is an energy that flows throughout your entire body. Try not to force any specific type of breathing. Instead, allow yourself to keep a steady and natural rhythm. It should feel as though the body is breathing on its own and you are simply noticing it. As you continue to breathe deeply and slowly, feel your body beginning to relax as you find and maintain a calm state.
Step 5: Focus on Your Feelings
Notice the feelings you are experiencing in the present. Do not analyze or judge the feelings and emotions that are coming up. Welcome the different sensations you are experiencing, whether they are heavy or light. If you notice some negative energy and feel down or worried, try to find some balance within your mind and body by bringing feelings of serenity to oppose and replace the negative emotions. You should also be aware of the feelings you have had in the past. Overcome feelings you had earlier in your life in order to more fully relax and regain power over your emotions.
In Conclusion…
Yoga nidra is great for connecting with your mind and body. If you are looking for a meditative practice, yoga nidra may be the best option for you, especially because it is more beneficial than regular sleep. With that said, you still need to maintain a consistent sleep schedule. However, yoga nidra is great for obtaining a restful and meditative state.
Best Meditation Apps for Androids

There are several meditation apps, but which ones are the best for you? If you have an Android, there are apps you can use to meditate. Although there are also several meditation apps for iPhones as well, you can find that Androids have similar apps to help you meditate and practice breathing exercises. Meditation is simple and easy, but it also requires focus and dedication. If you are interested in meditation, finding the best meditation app for you when you have an Android is an excellent choice. Listed below are a few suggestions for the best meditation apps for Androids.
Headspace
$7.99 per month
Although the app is not free, it does start with a free ten-day trial. After the ten-day trial, the Headspace meditation app costs $7.99 per month. Before you decide whether or not you want to commit to the app fully, you should give it a try and see if the app works best for you and your needs. Because it has a free trial, you can try it out and if you like it, you can subscribe. However, if you do not like what the app has to offer, you can try a different meditation app.
The Headspace meditation app is not only for Androids, the app also works on iPads, iPhones, and desktops. This app is best for those of you who want lots of options. With guided meditations that have spoken exercises that last from two minutes to up to an hour. Each meditation also gives you the option to pick a specific topic, such as stress, anxiety, relationships, and on the go.
Aura
Free
If you enjoy new things every day and dislike repetition, this app is perfect for you. The Aura meditation app allows you to practice meditation everyday with new and stylized lessons. The best part is that if you are busy, the app has three-minute lessons that never repeat. Teachers are constantly adding new and interesting recordings to the app so that you are never bored.
There are additional benefits the app has to offer, such as setting up your meditation practice by personalizing the lessons. Before you start your meditation practices, you set up the app by entering your age and your level of stress and optimism. If you are feeling stressed one day, the mediation app adjusts to how you are feeling. On the other hand, if you are feeling optimistic a different day, Aura will provide you with a meditation adjusted to what you need. Depending on your mood, Aura listens to what you are feeling and offers you lessons based on what you need. If you enjoy a particular lesson, you can save it and listen to the meditation again at a different time.
Aura is unique in that it also gives you the opportunity to note what you are grateful for everyday, which has a positive impact on your overall mental health. By incorporating meditation lessons and mindfulness features, the Aura app is a great option.
10% Happier
$7.99 per month
The app follows meditations taught by professionals. If you are looking for strict professionalism, the 10% Happier meditation and mindfulness app is perfect for you. Well-known and experienced mindfulness teachers teach meditations on this app in order to help you get the most out of the experience. Each meditation varies and has a specific topic like coping with anxiety and helping you fall asleep.
The app also works on iPads and iPhones as well as Androids. Although the app is free when you download it, you have the option to subscribe for $7.99 per month. In order to attain the best features on the app and have the best meditating experience, you need to subscribe.
Smiling Mind
Free
Are you looking for a meditation and meditation app that is free and really easy? This app is a great option for you. The Smiling Mind app is originally intended for children and young people who are struggling with their emotions. However, the app is an excellent option for adults as well.
Because the app is free and super easy, it can fit almost everyone’s needs. The programs are outlined by age from seven to eleven years. If you are looking for something more complex, a different meditation app may be better for you. The Smiling Mind app is suggested for younger audiences, though it should not stop adults from trying it out.
In sum…
There are several meditation apps to choose from, which is why the few Android apps listed above are meant to help you choose the best one for your individual needs. If one meditation app is not working for you, try a different one until your needs are met.
How to do Bridge Exercises
If you are looking to workout your buttocks, then the bridge exercise is a wonderful option. The bridge exercise specifically strengthens your gluteus muscles and your hamstrings. Not only does the exercise focus on your buttocks and the back of your upper leg, it can also improve the core and provide spinal stabilization.
There are several variations of the bridge exercise, including the single leg bridge, inverted bridge, bridge pulses, and more. In order to complete more complex and complicated variations of the bridge exercise, you need to learn the basics of a simple bridge position and bridge exercise. Follow the steps and tips below for how to do bridge exercises.
Steps for Bridge Exercises
Step 1: Lie Down
First, lie down with your back on the floor. Place your hands palms down by your sides and bend your knees. Then, keep your feet flat on the floor with your heels equally spread apart. Set your feet under your knees. If you wanted a more complicated bridge exercise, try the single leg bridge exercise in which one leg is lifted instead of both of your legs being bent. However, for the purpose of this article, we will continue going over the basics of the bridge exercise.
Step 2: Raise Your Hips
Tighten your buttock muscles and slowly begin to raise your hips. Maintain a position in which you keep a straight line from your knees to your shoulders and make sure to not let your shoulders tense or tighten up. Keep your shoulders away from your ears and focus on tightening your gluteus muscles and core. If your hips begin to lower or sag, slowly situate yourself back to the floor by dropping the hips down. When you are ready, start again.
Step 3: Hold
Hold the bridge position for about twenty to thirty seconds, or more if your prefer. If you want a more challenging bridge exercise, try bridge pulses that involve keeping the hips raised then lowered in a steady rhythm. Do not worry if you are having trouble holding the position for the bridge exercise. Take your time and do not get frustrated. Start with ten seconds or less if you need to at first, and then work your way up from there.
Benefits
There are several benefits for completing the bridge exercise. It is meant to target and strengthen your buttocks. However, it can do even more than simply helping you strengthen your gluteus muscles.
Core
Although you may be interested in practicing bridge exercises for the purpose of strengthening your glutes, bridge exercises also have a great impact on your core as well. By strengthening your core with bridge exercises, you are tightening up your muscles. Even holding the basic bridge position for a period of time will strengthen your core muscles if done correctly. If you continually practice the bridge exercises, you will engage all of your core muscles like the transverse abdominous and your obliques.
Posture
Practicing bridge exercises also help with improving your posture. Because you are strengthening your glutes and stretching the spine, you are also improving your posture. When you are sitting or standing, you use important muscles like those located in the buttocks and spine. Keeping and maintaining a nice posture is easier when you practice bridge exercises, especially because they locate and strengthen a specific area of your body. As previously mentioned, in addition to strengthening your glutes, the bridge exercises also strengthen your core. Strengthening your core also helps with maintaining a nice posture for long periods of time.
Reduce Pain
Bridge exercises bring balance to the body because we tend to overwork one part of the body like the quadriceps. By solely focusing on one part of the body, it is more likely that you will experience pain and possibly an injury. The posterior chain, which includes the glutes and hamstrings, are fully engaged during the bridge exercises. Reduce knee and back pain by practicing bridge exercises and bring balance to your body.
To sum it all up…
Bridge exercises are simple exercises meant to target your buttocks and strengthen your core. Take a few seconds each day to practice bridge exercises if you want to strengthen your gluteus muscles and hamstrings. There are several benefits from practicing bridge exercises, which is why they are highly recommended. Make sure to keep your feet and shoulders completely on the ground. If you need extra support and stability, spread your arms out wider from your sides. Have fun with it and enjoy yourself!
Conquering the Pigeon Pose
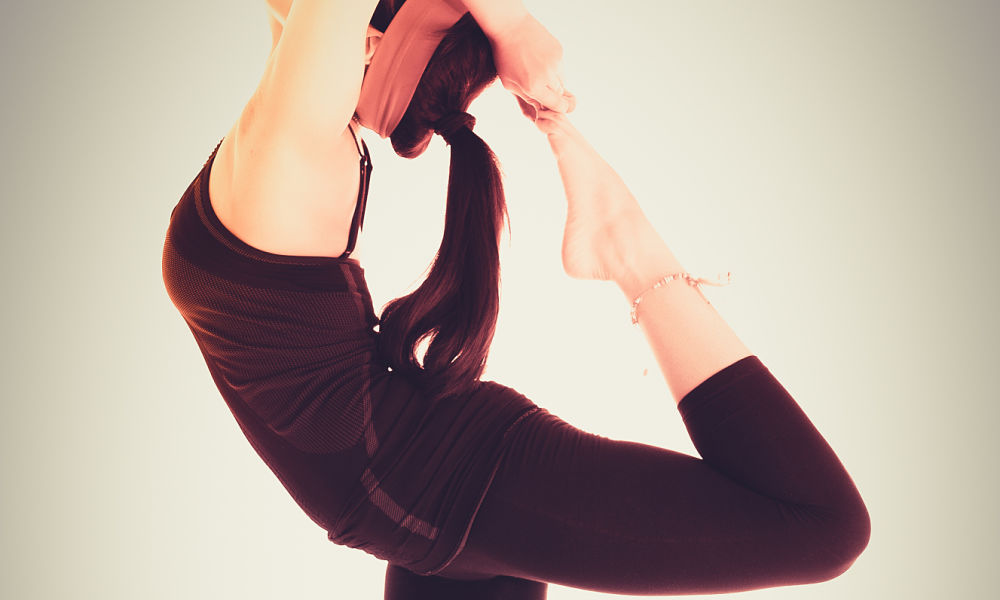
Are you interested in conquering the pigeon pose? If you are a fellow yogi or enjoy practicing yoga, you should know the basics of the pigeon pose. The pigeon pose is also known by its Sanskrit name, Eka Pada Rajakapotasana. When the pose is done correctly, your hips begin to open up and you will feel a nice, deep stretch.
There are several variations of the pigeon pose, including the sleeping pigeon pose, modified versions of the pigeon pose, and grabbing your foot from behind while staying in the pigeon pose. In order to conquer all variations of pigeon pose, you must first start with and complete a simple one-legged king pigeon pose. For the purpose of this article, the sleeping pigeon pose and the one-legged king pigeon pose will be discussed. The following steps and tips are intended to help guide you along your journey towards conquering the pigeon pose.
Step 1: Hands and Feet
With your hands and feet placed on the floor, get into either the downward dog position or the tabletop pose. As soon as you are comfortable, begin to shift your weight so that you can bring your right or left knee forward. It is generally much easier to transition from the downward facing dog position into the pigeon pose, but if you are more comfortable with the tabletop pose, follow what is best for you. Your left or right knee should be comfortably placed in front of you in between your hands that are still touching the floor.
Tip: Make sure to bring your thigh all the way down onto the mat. You do not want to put too much weight on the bent leg. If you find it difficult to adjust yourself or cannot seem to bring your thigh to the floor, find a prop. Props are the best options in yoga because they provide support and allow you to engage and ultimately grow in every pose. So, use a prop whenever you feel discomfort or need additional support. In the pigeon pose, you can place a blanket or a block underneath your thigh of the bent leg.
Step 2: Lift Up
As you keep your front leg bent, make sure to keep your back leg straight behind you. The leg that rests behind you should be relaxed but straight. Your knee and the top of your foot should be the only things touching the ground. Once you are comfortable, begin to push up through your fingertips and lift through your torso. If you prefer to keep your torso lowered in the sleeping pigeon pose, simply adjust your arms so that they are extended forward and your forehead rests on the floor. If you decide to stay in the sleeping pigeon pose, make sure that you are not forcing all of your weight on that front leg.
Tip: Make sure to keep your hips square and even, and adjust your torso so that it faces forward. While you find the pigeon pose, make sure to also keep your front foot flexed. In order to protect your ankles, flex your foot and be conscious of whether you feel any tightness or pain. The front foot that is flexed should be placed away from the thigh, not under it.
Step 3: Hold and Release
Hold the pigeon pose for up to a minute, or longer if you prefer. Switch to the other side and follow the same steps. In order to make a smooth transition out of pigeon pose, tuck your back toes and lift your knee off of the mat. Then, make your way back to downward dog or tabletop pose and switch to the other leg.
Tip: As you follow each step and hold in the pigeon pose for a minute, keep your focus downward. Try not to tighten up or feel tense. If you find that your shoulders and neck are beginning to feel tense, try the sleeping pigeon pose. While you are in the sleeping pigeon pose, you can use props like blankets and pillows to rest your head on, which will relax the muscles in your neck. Also, remember to breathe. It is important to take deep breaths in and out as you continue your yoga practice, especially during poses like the pigeon pose.
Conquer the Pigeon Pose
Use the steps listed above to help you conquer the pigeon pose. In order to achieve more advanced pigeon poses, you need to start with the simple one-legged king pigeon pose where your back leg is straight and your front leg is bent, as explained earlier. Good luck and namaste.
What is a Lentil?

What is a lentil exactly? Lentils vary in color, shape and size. They are pulses, or more specifically there are dried seeds of legumes. Although they are similar to split peas, lentils are more various because they come in several colors and sizes. In fact, lentils can range from the color red to green to even black, all of which are different shapes and sizes.
If you are interested in consuming lentils, there are many health benefits like being low in calories and high in nutrition. Lentils are especially beneficial for those of you who are interested in becoming vegetarians. Listed below includes more information about the health benefits of lentils.
Protein
Lentils are an excellent source of protein, especially for vegetarians and vegans. With low amounts of fat, cooked lentils can provide up to 18 grams of protein per cup. Unlike beef and fish and other meat that have lots of protein as well as high amounts of saturated fat and cholesterol, lentils are an even healthier option. If you are trying to find a healthy food with high amounts of protein, lentils are a great option.
Fiber
Not only do lentils contain high amounts of protein, they also have high amounts of fiber. Additionally, lentils contain insoluble fiber, which helps with regulating bowel movements and help with your digestive health. Foods like lentils that have high amounts of fiber are super healthy and can even help decrease the risk of colon cancer, heart disease, diabetes, and other diseases or conditions.
If you are trying to lose weight, you should try incorporating lentils into your diet. With lots of fiber, lentils will keep you feeling satisfied. They also are low in calories and are low in fat, which is wonderful for those of you who want to lose weight.
Folate
Folate is very beneficial for your overall health, which is why it is highly recommended for pregnant women to include folate into their diets in order to have a healthy baby. Consuming just a cup of cooked lentils has the amount of folate needed for an adult’s required daily diet.
Also known as folic acid or vitamin B-9, folate is also known for keeping the heart healthy. Folate keeps homocysteine levels low, which is great for your heart health. In addition to folate, magnesium is also prominent in lentils. Magnesium helps with improving blood flow and in turn helps keep the heart happy and healthy. As previously mentioned, lentils have high amounts of fiber. With high amounts of fiber, lentils decrease the risk of heart disease.
Iron
Lentils are also an excellent source of iron. Iron helps transport oxygen throughout your body, which boosts your energy and metabolism. If your energy is low, consume a cup of lentils to increase your energy more naturally and healthily. Although lentils have lots of iron, it is a nonheme iron, which is more difficult to absorb than heme iron found in meat. Incorporate lentils with some fish or meat or if you prefer salads have some lentils with your dark greens. With that said, if you are a vegetarian or vegan, lentils are still a great source of iron.
Cholesterol
By consuming lentils, you are also lowering your cholesterol levels, which can in turn reduce the risk of heart disease and having a stroke. With lowered levels of cholesterol, your arteries stay clean and help keep your heart healthy. As mentioned earlier, lentils have high amounts of soluble fiber, which lowers blood cholesterol. Overall, lentils are a great option, especially for keeping your heart healthy.
Other Information
Usually, you can purchase lentils that are dried. Dry lentils have a long shelf life if they are stored in an air-tight container. Keep the lentils away from heat and moisture in order for the lentils to last even longer. Because there are several different kinds of lentils that come in various sizes and colors, you should experiment with what you like best. You can usually find lentils in the bulk section of your grocery store.
A Few Last Words on Lentils…
Lentils are evidently beneficial for your overall health, especially because of its low calorie and high fiber contents. You can consume lentils in various ways, including eating them with crackers, salad, and other foods. If you are a vegetarian or a vegan or simply want to incorporate a more healthy option into your diet, lentils are a great source. Not only are lentils healthy, but they are also affordable, making it easier to eat healthy.
Practicing Baby And Me Yoga

Baby yoga usually involves a parent practicing yoga with his or her child. If you are interested in baby yoga, then follow the suggested poses below. Here are some tips and yoga poses to practice with your baby.
Of course exercise is important for your overall health, but how can you find time to exercise when you have a little one constantly by your side? Baby yoga is a great to exercise both your mind and body while staying connected with your baby. You are able to bond with your child on a physical and spiritual level while practicing baby yoga. Practicing baby yoga is recommended more towards people who are experienced yogis so that way you can have the best experience with your child.
Downward Dog
Get into the downward dog position with your baby lying underneath you. As you inhale, bend your elbows staying in downward dog and lower down until you reach your little one. You can give your baby a kiss while you lower yourself down. It is important to maintain eye contact as you practice the various poses to keep your connection. Then, as soon as you are ready, lift up back to downward dog as you exhale. Continue the up and down motion and feel your core and legs strengthen. Keep your head down and put less pressure on your wrists by staying in the downward dog angle of the body. Repeat the pose as many times as you want.
Cat-Cow Pose
Place your baby underneath you while you get into the cat-cow position. Your hands and knees are on the ground while your baby is lying on his or her back. Keep your hands under your shoulders and your knees beneath your hips. With your child between your hands, begin your cat-cow by bending the back and bending the head down. Then, slowly transition as you bend your back upward with your head and hips upward. During the cat pose (with your head facing upward) breathe in slowly and deeply; during the cow pose (with your head facing downward) exhale slowly and deeply. Smile down at your child and have fun as you repeat the pose several times. You should feel your spine begin to warm up.
Child’s Pose
The child’s pose is a great position for practicing baby yoga because it is allows you to stay in a comfortable position while also focusing on your baby. Make sure to take time and listen to your body if something does not feel right. Get into child’s pose and then lower down so your forearms touch the ground. With your child lying on his or her back between your hands, give your baby a kiss in the child’s position. Widen your knees until you are able to sit back with your buttocks on your heels. Find a comfortable position with your arms straight overhead. Stay in child’s pose for a few breaths before returning to the previous position on your forearms.
High Plank
Again, place your child between your hands lying with his or her back on the floor. Raising yourself off of the ground, keep your body straight and strong in the high plank position. Make sure to take breaks if you need to if your wrists or knees are bothering you. Keep breathing in and exhale out slowly and deeply as you smile down at your little one.
Tree Pose
Unlike the poses listed above, the tree pose involves holding your child, not lying on the floor. The tree pose is great for practicing balance and staying focused with your baby. Start with the mountain pose and hold your baby with both hands against your lower chest. Shift your weight onto one foot and place the other foot against your standing leg, either on your calf or inner thigh. In order to find balance faster and more effectively, make sure that your mountain pose is stable before you transition into the tree pose. Also, keep your gaze focused on a single spot in the room, preferably on the floor or the wall across from you. Make sure to breathe and have fun with it.
Continue Your Practice
In addition to the baby yoga poses listed above, there are other practices and poses you may want to perform with your child. Remember, practicing baby & me yoga should be fun and restorative, so if you find yourself struggling with the practice, do not feel pressured or anxious. It may take time to conquer each pose if you want to keep practicing baby yoga.
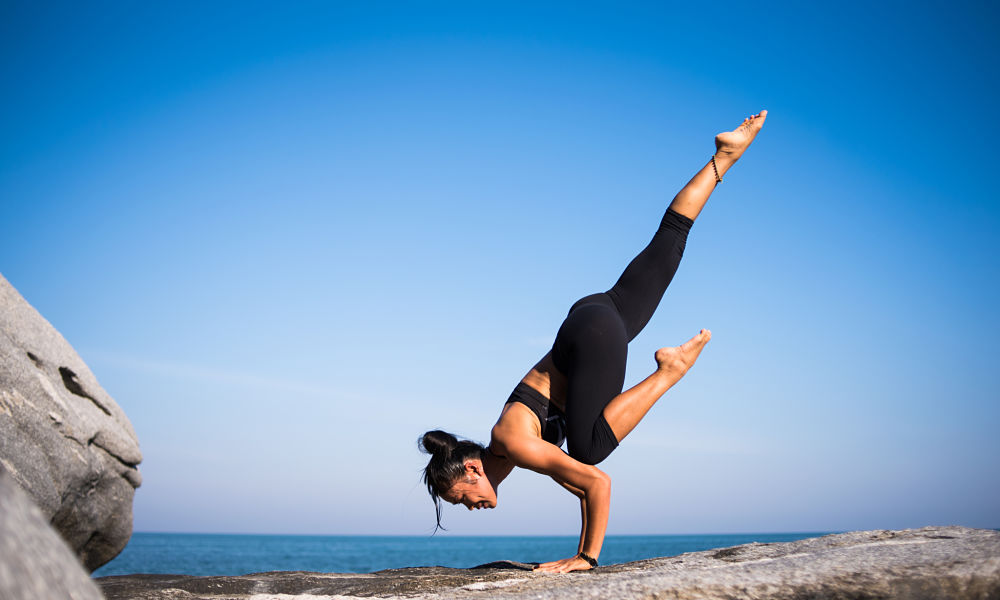
Crow Pose: Simple Steps and Tips
Are you interested in yoga? Do you want to learn how to conquer the crow pose? Here are some simple steps and tips for accomplishing the crow pose.
Also known as the crane pose, crow pose tends to be the first arm balance pose introduced to yoga students. Because the crow pose is a foundational pose for other arm balances, it is important to first learn the basics in order to accomplish other and more difficult poses.
The Sanskrit name for the crow (crane) pose is Bakasana. The pose requires strength and balance, and it is known for strengthening the upper arms, forearms, wrists, and your core. If you are interested in conquering the crow pose, look at the following tips and steps.
Step 1: Low Squat
First, you are going to need to start in mountain pose at the front of your yoga mat. Then, place your feet about as wide as your mat with your arms relaxed at your sides. When you are ready and have found balance, bend your knees and lower yourself into a low squat.
Coming into a low squat, make sure your thighs are spread wide and your feet are close together at about hips-width apart. Your heels should stay on the floor, but if they lift, you will need to support them with a prop like a blanket. Unless you can keep balance in the low squat, it is recommended that you use a prop to assist you. Props are always a great option in your yoga practice because they help with balance and keep you stabilized. For more balance, keep your elbows on the inside of your knees.
Step 2: Palms to the Mat
After placing your elbows on the inside of your knees, keep your palms facing away from you. With your hands up and facing forward, push your elbows out. If you are struggling with balance, start with step one and begin again. It is always best to move through the motions slowly and steadily. In order to maintain balance, you should not rush from one step to the next. It is important to stay focused and relaxed as you continue through the steps.
As soon as you feel balanced and ready, begin to lean forward and place your hands on the floor. Keep your hands about shoulder-width apart and keep your fingers evenly spread. As you place your palms to the mat, keep the pressure spread evenly across your fingers and palms. Make sure to keep your head lifted and your hands slightly in front of you.
Step 3: Lift Your Hips
Pushing your hands into the ground, slowly lift your hips and lean forward. Keep the balls of your feet on the ground. Make sure to bend your elbows and trust yourself. Although your hips are lifted, keep your back rounded and your tailbone tucked in towards your heels. This is all about strength and balance; if something does not feel right, start over and remember to breathe.
Your focus should stay lowered between your hands or if you prefer, look a bit forward just above the hands.
Step 4: Lift Your Feet
Now it is time to lift your feet. But first, you need to take one foot at a time. Slowly lift your left or right foot. You should still be leaning forward and engaging your arms and core. Keep breathing and make sure you are pressing on your hands evenly. Stay in this position for a few moments until you are comfortable to move on.
Lift your opposite foot as soon as you are ready and have found balance. When you are more experienced, you will be able to lift both feet at the same time. Additionally, as you build more strength, you will be able to straighten your arms without falling.
Hold the crow pose for at least a minute if you can. At first, it may be difficult to hold the pose for such a long period of time. If this is the case for you, take it slowly and hold the pose for as long as you can. Once you are finished, slowly lower back down by leaning back and placing your feet back on the floor.
Completing the Crow Pose
Now that you have been introduced with simple steps and tips you are capable of trying the crow pose. Remember to not get frustrated with yourself if you keep falling out of the pose. It will take time to complete the crow pose. Soon you will be ready for more challenges and yoga poses.
Find Morning Sickness Relief With These Remedies

Are you struggling with morning sickness? You may want to try using some natural morning sickness remedies. These remedies are perfect if nothing else has worked for you.
Morning sickness usually occurs in the morning, hence the term. However, feelings of nausea and vomiting can also happen at different times during the day or even at night. Usually, morning sickness is worse during your first pregnancy and during the sixth to twelfth weeks. It tends to be caused by a number of things (though not necessarily all of them at once): hormonal change, low levels of blood sugar, stress or fatigue, vitamin deficiency, and strong smells.
In order to relieve your morning sickness, try the following natural remedies listed below. If one remedy does not seem to be working, try another or several at once.
Vitamin B-6
Taking vitamin B-6 is a great and effective way to relieve your morning sickness. You should take 25 mg every 8 hours or a total of 50 mg a day for the best results. As an easy and effective option, taking your vitamins helps you control your nausea.
Vitamin B-6 helps move magnesium into the cells, helps with hormonal balance, and helps support the liver. More specifically, vitamin B-6 helps with the regulation of the hormone cortisol, which directly affects your blood sugar levels. As mentioned earlier, low blood sugar can make you feel nauseated, which is why vitamin B-6 is great for maintaining balanced levels of blood sugar and hormones. It also helps support the liver by clearing away excess hormones.
In addition to taking vitamin B-6, you may also want to try taking vitamin B-12 and vitamin D. If you want to find foods rich in vitamin B-6, try including chicken, turkey, beef, spinach, green peas, pork, tuna, broccoli, salmon, cashews, and asparagus into your diet. Focus on foods with vitamin B-6 and other essential vitamins, and avoid spicy, fried, fatty foods as well as caffeine.
Ginger
Try incorporating ginger into your diet to lessen your morning sickness symptoms. There are several ways to consume ginger, such as drinking ginger tea or taking the ginger root in capsule form. You can also eat ginger chews, drink ginger brew or gingerale, eat ginger cookies, or chew on crystallized ginger. Ginger has been known for helping soothe stomachaches, but it also helps with morning sickness.
Even a little ginger can go a long way. However, not every method works, including ginger. If you find that ginger does help you, though, then keep using this method. Ginger is safe and natural, which is why it is a recommended remedy for morning sickness.
Hydration and Exercise
It is important to stay hydrated and exercise. If you find that it is difficult to keep water down, try frozen fruit and natural juice popsicles.
Exercise is also an important way to lessen your morning sickness. During pregnancy, mild exercise or simply going for a walk can help relieve your morning sickness. Get some fresh air and go for a walk, especially because some sunlight may also help. By exercising, you are not only relieving your morning sickness, you are also relieving hormonal activity. Bringing your hormones in balance will have a positive effect on your morning sickness symptoms.
In addition to staying hydrated and getting exercise, it is equally important to get enough rest. Because stress and fatigue can cause morning sickness, it is significant to get enough sleep. When you do not get enough sleep, your morning sickness symptoms can get worse. Also, try getting out of bed slowly and avoid rushing.
Acupuncture
Treat your morning sickness with acupuncture treatments. Apply pressure to the wrist on the P6 acupoint in order to soothe and relieve morning sickness. There are wristbands called Sea Bands that have a hard point placing pressure on the wrist. Wristbands can be inexpensive and effective, but it may not work for everyone. As previously stated, not all methods for relieving morning sickness are 100% effective, which is why it is important for you to do whatever works best for you personally.
Find What Works for You
It is very important to find what works best for you because no one knows what you need except you. Take these remedies and approach each with an open mind so that you can find the method that helps relieve your morning sickness. If you would like more information, visit MindBodyGreen for more suggestions and remedies as well as other advice and tips for morning sickness relief.
Is Sourdough Bread Gluten Free?

For those of your who are trying to reduce your gluten intake, sourdough bread may be an excellent option for you. Sourdough bread is known for helping your gut with beneficial bacteria. Before we discuss the benefits of sourdough bread, let us first look at gluten intolerance and the factors that affect your intolerance.
What is gluten?
Breaking gluten down by its proteins, it has two categories in grain: the glutelins and the prolamins. However, in wheat the glutelins and the prolamins are glutenin and gliadin. The protein gliadin is commonly known as the main cause of gluten intolerance. Enzymes found in the stomach as well as the small intestine digest glutenin and gliadin.
What is sourdough?
Sourdough can be considered as simply tasty bread, a mixture of water and flour. Usually the mixture sits over a period of time so it can ferment. The process is much more complicated, and it involves an enzyme in flour known as amylase which breaks down the starch into sugar. The bacteria considered as gut friendly is called lactobacilli and is found in the sourdough and feeds off of the sugar from flour. This bacteria in sourdough is also what helps decrease the amount of gluten in wheat bread.
Why choose sourdough bread?
It Is Good for Your Gut
You may have heard about how sourdough bread is good for your gut. Well, it is true! Gluten-free sourdough bread is perfect for those of you who are trying to eliminate gluten from your diet and at the same time stay healthy. By incorporating gluten-free sourdough bread into your diet, you are helping your healing process move along. During the early stages of your healing process, gluten-free sourdough bread is a great option because it has all the good kind of bacteria for your gut.
Easier to Digest
Sourdough bread is much easier to digest than other conventional breads. It is easier to digest because of its good bacteria. The bacteria-yeast found in sourdough bread breaks down starches, as mentioned earlier. By breaking down the starches in the grains, the bacteria-yeast is essentially acting as pre-digesting the bread, which makes it easier to digest.
Wild Yeast
Made with wild yeast, sourdough bread has been around for centuries. Instead of using instant or fresh yeast, sourdough bread has wild yeast. The process in making sourdough bread involves fermentation, which increases the production of good bacteria. Because the fermentation process breaks down four gluten forming proteins, more people with gluten intolerances are able to consume sourdough bread.
Healthy
There are several organic recipes online that allow you to make your own sourdough bread. Using organic ingredients, you can consume something that is healthy and good for your body. Additionally, there are recipes that include ingredients without GMO’s and are completely organic. Also, sourdough bread has a lower glycemic index. This means that your blood sugar levels will not spike as often. Sourdough bread is a wonderful option to try, especially if you are trying to eliminate gluten from your diet.
Is sourdough bread gluten free?
So, is regular sourdough bread gluten free? To be specific, sourdough bread is not gluten free. In fact, sourdough bread does not work for everyone. However, with that said, you should still give sourdough bread a shot because it can make your healing process easier as you attempt to consume foods with or without gluten. Sourdough has gliadin proteins that make it easier to digest and helps with decreasing levels of blood sugar. Although sourdough bread is not gluten free and may not completely heal your gluten intolerance, it is a great way to prepare yourself for foods with gluten.
Sourdough bread may not cure your gluten intolerance or gluten allergies like celiac disease, but it still is better for you than other types of bread. It might even help prepare you to eat other kinds of breads in the future because it can help you transition fro one diet to another. Different levels of gluten will affect various people differently. So, sourdough may not be right for you. Keep in mind that bread is not necessarily healthy or recommended if you desire to lose weight. However, sourdough bread is a healthier option if you are craving some bread.
Conclusion
Sourdough bread is not necessarily gluten free, so be careful of what you consume. However, it can be a better option, especially if you are transitioning into or from a gluten free diet. Remember, sourdough bread may not be the right choice for you, but if it is, enjoy all of its benefits!
Relieve Sciatica Pain With These Easy Stretches
If you are experiencing sciatica pain, you should consider stretching to relieve the pain. Certain stretches target your lower back and lower body, which can inevitably help ease and soothe your pain.
What is sciatic pain?
Sciatic pain occurs in the sciatic nerve that runs through the piriformis, which is located in the lower spine and buttock. Tightness causes the pain because the sciatic nerve affects your lower body tremendously. Most often, sciatica is caused by a sedentary lifestyle that involves a lot of sitting. The following stretches listed below can help with your pain and relieve any tightness or tension. Try practicing the following stretches at the beginning and end of each day for the best results, and do what feels best to you.
Piriformis Stretch
The piriformis stretch is perfect to relieve sciatic pain because it targets the piriformis. First, lie on your back and put your feet flat on the floor. Your knees should be bent and your back should be flat on the floor. Place your left ankle over your right knee and intertwine your hands around your right thigh. Begin to gently and slowly pull your right thigh towards your chest as far as you can. Hold this stretch for at least 30 seconds and then repeat with the other leg. Make sure to keep your top foot flexed so that you can protect your knee as you stretch.
Pigeon Pose
The pigeon pose is great for stretching the lower back and opening up your hips. Begin by starting in a downward facing dog yoga position with your feet together. Then, bend your right leg in order to draw your knee forward. Turn your right knee out so that it is facing toward the right and your foot is on your left. Your right leg is bent and your left leg is straight behind you. As you slowly lower your legs down to the floor, be gentle and keep your hands on the ground for support. You can either stay in the pose with your chest up or your face can rest down on your hands, bending your back in the process. Hold this pose for about 30 seconds or more before switching to the other leg. Make sure to breathe slowly and deeply.
Seated Hip Stretch
The seated hip stretch feels super good on the lower back and can definitely help relieve your sciatic pain. Stay seated on the floor with your legs straight out in front of you. Cross your right leg over your left leg. The left leg stays straight as your right leg is bent. Wrap your arms around your right knee and hug it towards you with your left arm as you twist. Hold this stretch for up to a minute and then switch to the other side. Make sure to keep your back straight and breathe deeply.
Self-Trigger Point Therapy
The self-trigger point therapy is very effective for providing sciatica pain relief. Use a lacrosse or tennis ball as long as if it is something small and round. Place the ball where your painful spot is in the glutes and then relax. The ball is between your body and the floor. Hold for up to a minute unless you need to spend more time in areas that hurt more than others. Rotate and move the ball to the other painful spots and areas for the same amount of time. Make sure to keep your body relaxed.
Other Ways to Relieve Sciatica Pain
Yoga
Have you considered trying yoga? Strengthen your muscles and stretch your body to become more flexible by practicing yoga.
Acupuncture
If you are tired of stretching, try acupuncture. However, it may not provide immediate relief because it can take up to 12 sessions of acupuncture before you experience sciatica pain relief. There is another form of acupuncture that is also effective and is called warming acupuncture in which the needles are warmed.
Chiropractic Care
People who see a chiropractor usually attend up to three times each week to experience pain relief. If you prefer not to have surgery, chiropractic care can be just as effective.
Massage
Set up an appointment to see a licensed masseuse in order to soothe your tense muscles along your lower back and glutes. Make sure to space the appointments at least a week apart.
Relieve Sciatica Pain
Observe the suggestions listed above, whether it is a stretching exercise or other forms of relieving sciatica pain. Take advantage of the possibilities that can help relieve your pain.